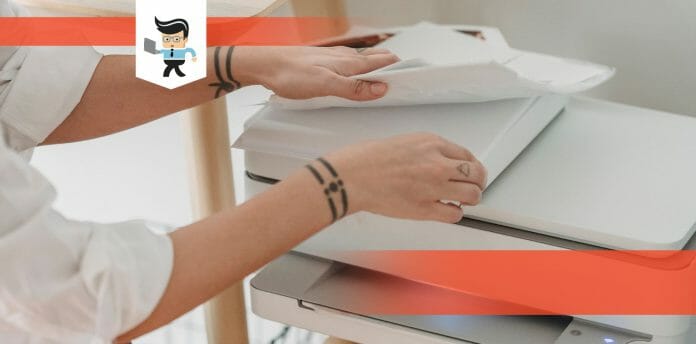
The best way to master how to print envelopes on HP printer is to practice with different envelope sizes. Commonly, printers are set to print A4-seized documents, and rarely for envelopes.
For this reason, you may ask: can I print envelopes on my HP printer? While the answer is a resounding “Yes,” we give you a detailed procedure in this post.
Contents [hide]
How to Print Envelopes on HP Printer Effectively
To effectively print envelopes on an HP printer, get your envelopes and set their sizes. Load these envelopes in the paper tray and go to your computer to change the printer’s printing preferences. Open MS Word or WordPad on your computer, set it up, and start printing.
Note that the procedure for printing envelopes is pretty similar to all HP printers. Let’s look at how to print envelopes on HP color Laserjet pro MFP M283FDW:
– Decide the Envelope Size
While A4 is the most common print size, printers can print almost any paper size. But that depends on the printer’s specifications. Usually, the printer shows the paper size once you load the tray.
Suppose it does not know the exact envelope size, so you can print it without alignment errors. Typically, HP printers will allow you to print various envelope sizes, including Envelope DL, Envelope C6, Envelope C5, Envelope Monarch, and Envelope A2. So, decide on the size and set them ready for printing.
– Prepare Your Printer
Switch on your printer, and pull out the paper tray. Ensure that the printer powers up. You should see the printer’s panel light up. Now, insert the envelope into the paper tray. Again, you must determine the correct number of envelopes the printer paper tray can hold. For safety purposes, insert about five envelopes at a time:
So, how do I set my printer to print envelopes? Inserting the envelopes in the paper tray varies with the printer. Here are some examples:
- LaserJet printers with a front tray: Place the envelope on the paper tray with the flap on the left side while the printing side faces upwards. Readjust the paper fasteners to maintain the envelope’s position.
- HP Inkjet printers (front paper tray): Insert the envelopes in a paper tray with the printing side facing downwards and the flaps facing the left. Move the paper width guides to rest against the envelope’s edges.
- HP Inkjet Printers (rear paper tray): Place the envelope on the tray with the flap facing the left side while the printing side facing upwards. Move the envelopes to the right and use paper guides to hold them in place. Do not bend the envelopes.
Do not print envelopes with coatings, shiny surfaces, windows, or clasps. This can cause jamming and printer damage. Since LaserJet printers generate heat, do not use envelopes with self-stick adhesives or other heat-resistant materials.
Usually, the heat causes the envelopes to stick on paper paths, or it may lead to an out-of-paper error message in some instances despite having papers in the paper tray.
– Set Your Printing Preferences
Setting the Print Preferences correctly will help you get the best prints. So, let’s look at the procedure for setting the printing preferences on Windows:
- Launch the Control Panel by pressing Win + R, type Control, and press Enter.
- Select Hardware and Sound and click Devices and Printers.
- Under the Printers section, right-click on your HP printer and select the Printing preferences option from the menu to open a new window.
- Click the Paper/Quality tab on this window to open other Settings.
- Go to the Paper Size under Paper Options, and click the drop-down menu to select your preferred envelope size.
- Hit the Enter key or click OK
- Go to the Apple Dock or Menu and select or tap System Preferences.
- Select Printers & Scanners, Print & Scan, or Print & Fax, go to your product, and click Options & Supplies.
- Go to Options or Driver
- Select your preferred Printing preferences. For instance, you can select Skip Blank Page, High-Speed Printing, Quiet Mode, or Warning Notifications.
- Click OK.
This step allows you to set the correct printing options.
– Print Your Envelopes With WordPad
You can get professional addresses on your envelope by using WordPad on Windows with the steps below:
- On your computer, launch WordPad: Press the Windows key and type WordPad. Click on the app when it pops up.
- Go to the top left of the screen, click File, and scroll to the Page Setup option from the left panel pop-up menu.
- Select Paper size from the drop-down menu in the box labeled, Size. The box specifies a default size specified in the default printing preferences. Tapping on the drop-down menu offers you different size options.
- Go to the Orientation section, check the Landscape option, and specify the margins Under the Magin’s section.
- Uncheck the box next to “Print Page Numbers” and click OK/Enter on your keyboard.
- Type the text, usually the address. Start with the address of the person you are sending the envelope to. This should be on the top left. Then type the return address (your address), select it, and click from the Paragraph section on the WordPad ribbon. Alternatively, you can choose the address text and press the “Tab” button to indent the text block toward the envelope’s center.
- Go to File on the top left, select Print from the menu, and select Print Preview to check how your envelope will appear. If you wish to make changes, click “Close Print preview” and make the changes.
- Otherwise, go to File>Print and click the Print option from the dialogue box. Select your HP printer and Hit Enter on your keyboard.
- Alternatively, press the Ctrl + P keyboard shortcut, select your printer, and click Print.
You save the document via Ctrl + S.
– Print Your Envelopes via MS Word
You can quickly use Microsoft Word to print your envelopes. The biggest trick here remains how you feed the envelopes. HP printer will not print envelopes if they are wrongly fed. Follow the steps below to master how to print on an envelope in Word:
- Launch a blank MS Word document on your PC: Go to Start> All programs>Microsoft Office>Word
- Go to the “Mailings” tab at the top ribbon and select Envelopes
- Type the receiver address in the Delivery Address box and the sender’s address in the Return Address box.
- Go to the Preview box and click on it to unveil a menu that allows you to set the envelope’s size, fonts, and margins. Click the OK button when done.
- Click the Print button to print your envelope.
Do you have a long Delivery Address or a different size? Go to Options and adjust the size from the left, giving you more room for the address.
Before printing your envelope, you will be prompted to save the file. The default saving format is PDF, but you can change it.
How to Print Your Envelopes on Mac
You can print your envelopes on Mac using the Pages or the Contacts app. Before printing on your Mac, set up your printer with the steps above. Let’s look at how to print envelopes on HP 4100 printer on Mac:
- For Pages, go to the File menu and click “New” from the top left menu.
- Select Stationery from the left pane of the template chooser and scroll down to the envelopes section.
- Select an envelope template – you will need to double-click on the template.
- Go to the Document tab in the Document sidebar, click the second menu under the Printer & Paper Size section, then select an envelope size.
- You can set a custom size if you do not see the size you need. Choose File, go to Page Setup, click the Paper Size popup menu, and select Manage Custom Sizes.
- Under the Envelope template, click/tap placeholder text in the recipient address and type the address. Delete or add lines based on your needs.
- Double-click the text in the return address and enter your address. Since the return address is a text box, you can drag your selection handles if you wish to resize them.
- Go to File, select Print, click Print on the pop-up list, choose your HP 4100 printer from the list, and click Print.
You can also use the Contact app. Here is how to print envelopes on HP 2700 printer:
- Launch Contact on your Mac and select the name of the Contact you wish to print on your envelope. Ensure you fill out all the address fields.
- Go to File > Print> Show Details
- Click the Style menu> Envelopes> Layout, and select envelope size from the Layout pop-up menu.
- Click Label> Select or deselect the check box adjacent to Print my address.
- Click Orientation> Landscape>Print.
Conclusion
So, how do I print envelopes on my HP Envy printer or any other HP printer? To print on an HP printer, do the following:
- Place your envelopes on the printers printing tray in the correct manner
- Set the appropriate printing preferences, such as envelope size
- Use Word, WordPad, Pages, or Contact to print the addresses on your envelopes.
- Remember, the key to stellar enveloping printing is how you feed the envelopes in your printer.
When the need to print an envelope comes up, follow the procedure in this post. They are on point and effective.
Ref:
- https://www.wikihow.tech/Load-Envelopes-into-an-Inkjet-Printer
- https://www.forbes.com/sites/forbes-personal-shopper/2022/06/09/hp-envy-inspire-7955e-review/?sh=4d9b667d0ba3
- https://support.apple.com/en-ke/guide/pages/tan0b239532d/mac#:~:text=Print%20an%20envelope&text=Click%20Stationery%20on%20the%20left,then%20choose%20an%20envelope%20size.

