How to dial an extension android is a question that arises among the users of Android devices when they want to call a specific company via the local number to file a complaint or any other reason.

While it is relatively easy to put in the extension number when utilizing a landline phone, which can be dialed right after the automated message comes on, things are a little different when attempting to do something similar using an Android.
While the techniques of using an Android to do this are not exactly complicated, it has to be admitted that it is unfamiliar, and the steps to follow require attention to detail.
There are two methods most frequently applied by users when attempting to dial an extension using their Androids, and we are going to take a look at both of them in detail in the sections below.
Contents
How Can I Dial an Extension on My Android Phone? Simplified
You can dial an extension on your Android phone after the main number by using the Wait technique on your phone dialer app. On the other hand, if this method does not work for you, you can also use the Pause method to dial the extension.
– Using the Wait Technique for Dialing Extensions
One way of dialing an extension using your Android device is by utilizing the “Wait” technique, which means you need to wait for a while until the automated message you hear finishes, after which you can enter the extension number.

To use this method to dial the extension on your Android, you have to start by ensuring that your phone is on. If it has been turned off, you can press the power button to switch it on again. Once it starts, give the operating system a little time to refresh as you wait a while.
After doing this, you will need to head over to the home screen on your Android, and then you have to find the Phone icon, which is the application responsible for calls to and from your device.
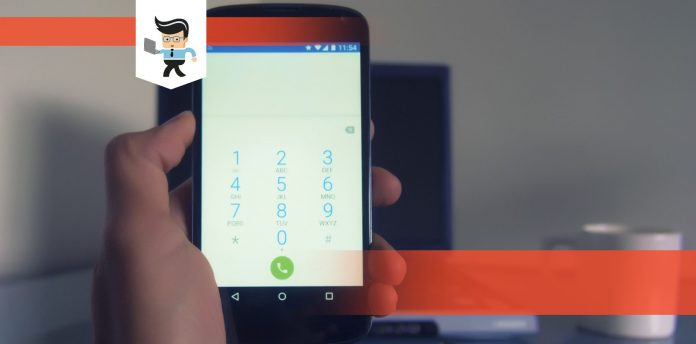
Once you have located this app, tap on it to launch it accordingly. From the interface, you see in front of you, head over to the dialer, and here you can put in the main number you want to reach.
– Using The ‘#’ Key
Dial in the main number you want to call, and then tap the # key for a long while. Doing this will prompt a semi-colon to show up right at the end of the dialed number.
This is what should usually happen by pressing the key, but it is possible that your specific Android system is designed to avoid inserting an extension in a number using this technique.
If that might be the case, you tap the menu icon near the dialer, which is represented by three vertical dots.
A small pop-out menu will appear with different options when you click this icon. From this list, you have to choose the option that reads “Add wait,” and once you do this, you will see that the semi-colon will now show up at the end of your dialed number.
As soon as the semicolon shows at the end of the number, you next need to put in the extension number with it. Then, head over to the Call icon and press it so that you can go ahead with the call you want to make.
Following this method will prevent you from being unable to put in an extension number using your Android number, and you can make your extension call in peace now.
– Using the Add Pause Technique to Dial Extensions
Another method you can use to put in the extension with the primary phone number is the “Pause” technique, which enables you to establish a link that connects your dialed call straight to the desired company department as soon as someone attends it.
To utilize this technique to dial an extension on the Android device, begin the process by ensuring that the phone you will use to carry out this method has been turned on.
If it is off at the moment, you will have to hold down the power button, which will turn it on again. As soon as it launches, it would be better to give it some time to refresh so that the operating system can get back to its prime flow.
Once you have achieved this by giving it some time to refresh before clicking anything, you will have to navigate to the home screen of your phone, where the leading applications are on display.
Now, you will need to look for the Phone app, which is easy to notice as it should be in the icon shape of a phone receiver, and it is the part of your device system responsible for dialing and calling.
As soon as you see the app on your screen, you will need to click on it, which will allow it to launch. You will see a space on the interface now, and this will be the place where you put in the numbers you want to dial, also known as the dialer.
– Putting in the Extension With the Main Number
You can utilize the dialer in your Phone application to type in the main phone number you are trying to reach. Once you have dialed your primary number, you will have to press down on the “*” key for some long seconds.
Pressing this asterisk button will prompt a comma to appear at the end of the dialed phone number on most Android devices.

However, if you cannot get this to happen on your phone because your device is not configured to add extensions to numbers in this way, then you can head over to the menu icon represented by three little dots stacked vertically.
Selecting this icon will prompt a small pop-out menu to appear, and from the various options on the list, you need to select the header that says “Add 2-sec pause”.
The final thing you have to do now is put in the extension number, as clicking the pause option will insert a comma at the end of the main number. Once you have typed in the extension, you can head over to the relevant button and contact the department you want to reach.
Conclusion
In our in-depth analysis of the various methods of dialing an extension on your Android device in the article above, we pointed out some general fixes that can be used if you don’t know how to put an extension on your phone.
A quick summary of the main points discussed is given here:
- You can dial an extension after the main number on the dialer of your Android by using the Wait method or the Pause method.
- If you use the Wait method, you will need to tap the # key on the dialer until a semi-colon appears, after which you put in the extension.
- Alternatively, you can also go to the dialer menu and click the “Add wait” option to make the semi-colon appear.
- If your use the Pause method, you will have to press the * key for a while until a comma comes after the number, and then you can dial the extension.
- If this doesn’t work, you can head over to the dialer menu and choose the option of adding a 2-sec pause, after which the comma should appear.
Hopefully, you have learned how to find the best way to dial an extension on your Android after these elaborate points. And we are confident that these methods will save you a lot of time, as you know precisely what you have to do now!


