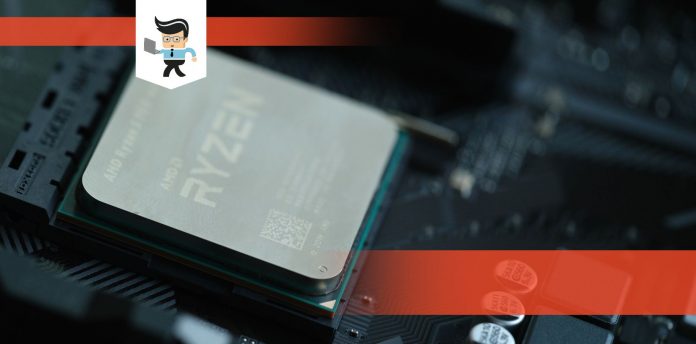
If you’re looking to overclock Ryzen 5 2600, this guide will point you in the right direction. We’ll provide you with a guide for the auto overclock feature – the Precision Boost Overdrive 2.0 – as well as the manual overclocking process.
 With this guide, you’ll be able to increase the speed and performance of your CPU.
Contents
Introduction and Components Used
The overclocking process used in this guide focuses on overclocking Ryzen 2600 on an X370 motherboard. Other motherboards you can pair the Ryzen 5 2600 CPU with include the B450, X570, B550, and B350.
Since using the AMD Precision Boost 2.0 will provide little results, we’ll focus on the manual overclocking process. However, for those who are looking to use the PBO 2.0 auto feature, we’ve provided a short guide below to help you out.
Note that the Ryzen 2600 overclock voltage, settings, and core frequencies will be the same even if you’re using a different motherboard from another manufacturer. However, the way they are named or the terms used may be different from what’s used in this guide.
Also, depending on your motherboard’s quality, not all options may be available, so you might experience a different mileage in that regard.
- Motherboard: X370
- CPU: AMD Ryzen 5 2600
- Graphics Card: ASUS Strix RX 570
- Cooling Unit: Gelid Phantom Black
- RAM: 16GB DDR4 3200MHz CL14 G Skill
- Power Supply: EVGA G2 SuperNova 750
How to Overclock Ryzen 5 2600
Firstly, you need to make sure that your chipset drivers and other necessary drivers for your setup are up to date. This goes without saying, but utilizing outdated drivers to overclock AMD CPU can cause stability issues and some of these problems may not even be related to the overclocking process.
You can run a synthetic benchmark on the stock setting so you’ll be able to determine whether or not there’s an improvement. If you’re overclocking for gaming, you can note down the current FPS you’re getting so you can see if there’s an actual increase after overclocking.
You’ll need to stress test your overclock, therefore it’s important that you download the programs listed below. These programs are essential for monitoring and stress testing. If you have overclocking software you are familiar with, you can use them. However, we recommend that you use the programs below since they are what will be used in this guide.
- HWiNFO64 for monitoring
- Linpack Xtreme for the stress test
- Prime 95 for stress testing
Configuring Your BIOS Settings
The AMD Ryzen features the Zen+ architecture, a technology that offers an excellent improvement over the Zen 1 architecture. Thanks to the Zen+ architecture, running DDR4 can be easily achieved with a qualified vendor list (QVL) XMP profile. While the motherboard used in this guide is only validated for 3200MHz, you can use a good kit of 3466 with the Hynix C-die, Samsung B-die, or Micron E-die.
It’s important that you test out your RAM kit before deciding to run a CPU overclock. This is because higher speed kits may not work at the rated XMP speed. If you find out you can’t run the estimated speed, you can set the base speed to 2133MHz.
 If you’re unsure or having doubts, you can stick to what’s provided in the qualified vendor list provided by your motherboard manufacturer. Check the manufacturer’s website for a list of verified RAM kits.
Using Precision Boost Overdrive 2.0 for Auto Overclocking
The Precision Boost Overdrive 2.0 is AMD’s automatic overclocking feature. While the program works well, it may not provide you with the best results. To know whether or not you’re getting optimal results, make sure you use a good case airflow as well as a third-party cooling unit.
You’ll need to make some adjustments to the BIOS settings in order to fully utilize the Precision Boost Overdrive 2.0. Also, there are tweaks you’ll need to run in order to override some of the limitations in the BIOS. These tweaks will also provide a longer boost duration. Here are the steps you need to follow:
- Set Precision Boost Overdrive to manual so you can adjust the settings
- Change the PPT limit to the maximum for your motherboard
- If you don’t know the PPT max for your motherboard, simply enter 99999 and it will change to the maximum automatically
- Change the TDC limit for your motherboard to the maximum value
- Change the EDC limit for your motherboard to the maximum value
- If you are unsure about the TDC and EDC limit, simply change the figure to 99999 and it will autocorrect to the right maximum value for your motherboard
- Increase the Precision Boost Overdrive scalar for your motherboard
- Increase the maximum boost time and voltage when using a specific boost value
- Set the Custom Precision Boost Overdrive Scaler multiplier to a value of seven or lower
- Set the Maximum CPU Boost Clock Override to the max value i.e. Core Boost to the highest level
- Change Platform Thermal Throttle Limit to manual
- Set the thermal value for Platform Thermal Throttle to 176/194 F or 80/90 C
Setting Up DIGI+ VRM for Ryzen 2600 Overclock
These Ryzen 5 2600 overclock settings are especially important for preparing your RAM and CPU for overclocking. However, we’ll be talking about how to utilize them for CPU since that’s what we are dealing with in this guide. We’ll also be providing a short rundown of the SoC domain for memory overclocking.
It’s important to note that the Load Line Calibration we’re using here is set to level four and doesn’t exceed level five. This is because level three and lower will provide you with a huge Vdroop. But with level four, you’ll only experience a slight Vdroop under load for this particular VRM.

- Set VDDCR CPU Load Line Calibration to level four; going lower may result in instability
- VDDCR CPU Current Capability should be between 100 percent to 130 percent
- VDDCR CPU Power Duty Control should be set to the maximum value
- VDDCR CPU Switching Frequency should be at 300; setting it to a higher frequency may be a waste of power
- Set VDDCR SoC Switching Frequency to automatic; if you’re overclocking MCLK or FCLK, set the value to 300
- Set VDDCR SoC Power Phase Control to automatic; if you’re overclocking MCLK or FCLK, set the value to max or extreme
- Set VDDCR SoC Current Capability to auto; if you’re overclocking MCLK or FCLK, then set it to 120 percent
- Set VDDCR CPU Power Phase Control to max or extreme
- Set VDDCR SoC Load Line Calibration to auto unless you’re using MCLK or FCLK overclock
- AMD CBS and Precision Boost Overdrive
What to Do When You Don’t Use AMD Precision Boost Overdrive Feature
If you’re not using the AMD Precision Boost Overdrive feature that was described above, you’ll need to turn off two different parameters in this section. These two settings are Global C-State and Core Performance Boost. The reason why you’re turning them off is to avoid instabilities as leaving them active can cause difficulties in manual overclock as well as instabilities:
- Simply go to the “Advanced” tab
- Click on the drop-down bar opposite “Core Performance Boost” and set it to off
- Select the drop-down bar opposite ” Global C-State” and set it to off
- Once you’re done go back to the Ai Tweaker tab and turn off Precision Boost Overdrive
Ryzen 5 2600 VDDCR Core Volts
This section is where you start overclocking. Note that the same voltage can be utilized for both the Ryzen 5 2600X and the Ryzen 5 2600. Make sure your Ryzen 2600 overclock voltage is safe for daily use. Most people now use 1.38 volts for their CPUs. Formerly, the overclock AMD processor voltage used to be 1.40 volts.
However, some users found out that their CPUs were degrading after they exceeded 1.38 volts. If you would like to use higher voltages, you can only use them for short-term applications, such as benchmarking and recording. You’ll also need to pair your CPU with excellent cooling.
 The recommended voltage from AMD is 1.300 to 1.350 volts. Community users who have overclocked their CPUs recommend that the voltage stay between 1.350 and 1.4000 volts. Anything beyond 1.400 is not recommended.
You’ll need to use two different settings here: the CPU Core Ratio and the CPU Voltage, also known as the VDDCR CPU Voltage.
VDDCR CPU Voltage and CPU Core Ratio
For the Ryzen 2600 overclock voltage, you can choose between the Manual and Offset Mode parameters. While the Manual parameter makes things easier, the Offset Mode offers excellent granular control over the voltage. However, you need to remember to keep the voltage within the safe limit. We recommend that you use the Manual parameter.
SoC voltage has nothing to do with CPU overclocking. It is only useful when you’re trying to tweak the Infinity Fabric clock speed (FCLK) or Memory clock speed (MCLK). If during the tweaking process you experience instability issues, the SoC voltage can provide you with great help.
Now, since all PC builds are unique, we recommend that you start the CPU overclocking process with AMD’s recommended voltage which is 1.350 volts. This voltage will power the stock cooling unit as well. However, you should expect to experience more fan noise than what you’d get if you use a robust cooling unit like the Gelid Phantom Black listed above.
The next thing to do is fill in the required overclock GHz in the CPU Core Ratio section. An excellent overclock will be 4.0GHz. To achieve this, you’ll need to fill in 40.00 in the bar opposite the CPU Core parameter.
Now Overclock Your CPU
Save your settings, exit, and boot into Windows. You’ll need to use the Linpack Xtreme or Prime 95 software to determine the stability of your overclock. If you’re using Prime 95, run Small FFTs for about 10 minutes.
For those using Linpack Xtreme, you’ll need to use the Stress test feature. You’ll run the stress test at least three times using all threads and cores as well as half the total capacity of your RAM. While running these tests, use the HWiNFO64 to monitor your temperatures and core voltages.
Your CPU should be able to pass either of the tests explained above. You can then decide on whether or not to keep your CPU overclocked at 4.0Ghz while fine-tuning the CPU voltage. The overclock results for this guide are an overclock of 4.0GHz, a Load Line Calibration of four, and 1.269 volts.
If you intend to change your overclock to a higher number like 4.1GHz, you’ll need to boot your device back into BIOS, change the CPU voltage to 1.38 volts and change the parameter of the CPU Core Ratio to 41.
Stability Testing
Once you’ve decided on the overclock you want to use on a daily basis, the next thing you want to do is carry out a stability test. We must reiterate that your voltage for daily use overclocking must not be more than 1.38 volts to 1.4 volts.
 The stability test will help you determine whether or not your CPU is 100 percent stable before moving on to other things, such as memory overclocking. For stability test, we recommend that you use the methods below:
- Complete a two-hour stability test with Prime95 using a custom 8K FFTs or Small FFTs
- Use the Linpack Xtreme to run at least 10 tests using all thread and cores as well as half of the total RAM capacity.
Conclusion
That’s all there is on how to overclock Ryzen 5 2600. Here is a quick summary to keep in mind when overclocking your CPU:
- Make sure your voltage doesn’t exceed 1.38 volts to 1.4 volts
- Carry out stress and stability tests
- Using the auto overclocking feature may not provide the best results
- You can pair the Ryzen 5 2600 with varying motherboards, including the X370 and B350
- Linpack Xtreme and Prime 95 are overclocking software used to conduct stress and stability tests
- HWiNFO64 is used to monitor the temperature and voltage of the CPU
- SoC voltage plays no active role in CPU overclocking
We hope that with our guide above, you’ll be able to successfully overclock your Ryzen 5 2600 CPU. Just note that the voltage wall for this CPU is 4.1 and the voltage limit for the Zen+ architecture is 1.4, and make sure your voltage doesn’t exceed 1.38 to 1.4 volts to avoid degrading your CPU.


