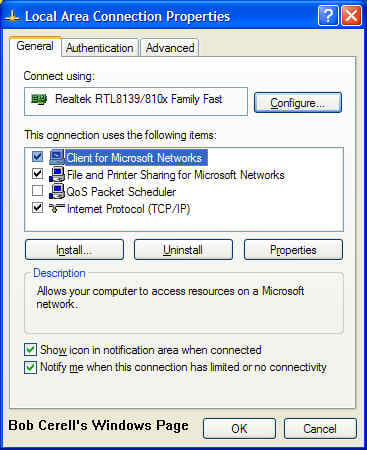
| Below are some of the details in how to network a WindowsXP Workstation. These instructions assume you already have a network card installed and correctly configured with the appropriate drivers. | |
|---|---|
|
|
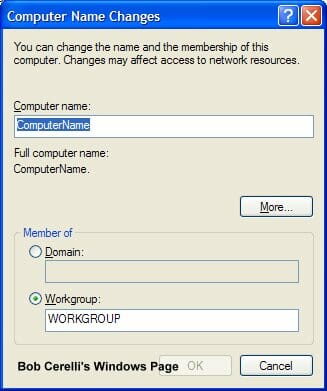
Changing the Computer,
|
|
| 1. | Right click on the My Computer icon on the desktop |
| 2. | Select Properties |
| 3. | Click on the Computer Name tab |
| 4. | Click on the Change button. |
| 5. | To change the computer, work or domain name, enter the appropriate information. Note: If you are on a Workgroup, make sure all computers have the same Workgroup name. |
|
|
|
| 6. | Reboot when requested |
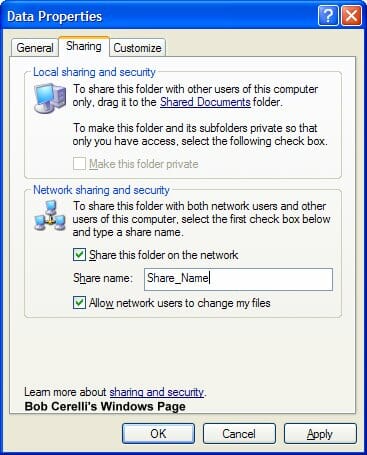
Sharing Drives or Folders |
|
|---|---|
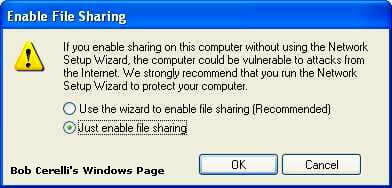
| 1. | Start the Windows Explorer |
| 2. | Right-click on a drive or folder you want to share |
| 3. | Select Sharing |
| 4. | In the Network sharing and security section, click on If you understand …. |
|
|
|
| 5. | Select Just enable file sharing and click on the OK button |
|
|
|
| 6. | Enter in the name of the share. |
| 7. | Click on the OK button |
|
|
|
| 8. | From the Remote Computer you should now be able to connect to \\SERVER_NAME\SHARE_NAMEWhere SERVER_NAME is whatever you named your computer and SHARE_NAME is the name of the share. |
| 9. | When connecting to an XP Pro computer, the default setting requires that it have the same name and non-blank password as the user on the remote computer. See my XP tips section for how to change this. |
| 10. | The default setting of XP Pro is to require a user password for network access. To disable this feature see the XP Tips Page. |
| 11. | You may also need to turn off the Firewall |

This site is copyrighted. No portion may be reproduced without my written permission.


